Stick welding, also known as Shielded Metal Arc Welding (SMAW), is one of the most versatile and widely used welding methods. Whether you’re repairing farm equipment, fabricating steel frames, or tackling DIY projects, it’s often the go-to process. But let’s be honest—stick welding isn’t always smooth sailing. You strike an arc, and suddenly you’re dealing with spatter, sticking rods, or welds that look like a bird’s nest.
Sound familiar?
The truth is, even experienced welders run into problems. The difference is knowing how to diagnose and fix them quickly. In this guide, we’ll break down the most common stick welding problems and solutions, explain why they happen, and show you exactly how to fix them like a pro.
Contents
Understanding Stick Welding Basics
What is Stick Welding (SMAW)?
Stick welding is like the “old reliable” of welding processes. It uses a consumable electrode coated in flux to lay the weld. When the electrode melts, it creates both the weld pool and a protective gas shield. That means you don’t need external shielding gas, making it perfect for outdoor work where wind would ruin other welding processes.
But here’s the catch—because everything depends on your technique, settings, and electrode choice, even small mistakes can cause big problems. Think of it like cooking over an open fire. You don’t have precise controls, so you need experience and awareness to get consistent results.
Stick welding is incredibly forgiving in rough environments, but it demands attention to detail. That’s why understanding common issues is crucial if you want clean, strong welds.
Why Problems Occur in Stick Welding
Most stick welding problems boil down to three things: incorrect settings, poor technique, or bad materials. Sometimes it’s a mix of all three. For example, using the wrong amperage can cause both spatter and poor penetration at the same time.
Environmental factors also play a role. Moisture, dirt, and rust can ruin a weld before you even strike the arc. Even something as simple as holding the electrode at the wrong angle can introduce defects.
The key is learning to “read” your welds. Every flaw tells a story—spatter means one thing, porosity means another. Once you understand these signals, troubleshooting becomes second nature.
Common Stick Welding Problems Overview
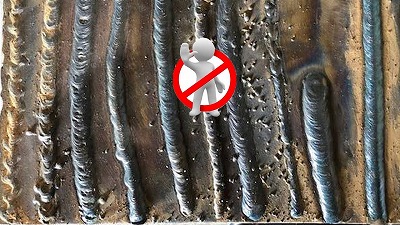
Visual Signs of Poor Weld Quality
Before fixing anything, you need to know what’s wrong. A good weld should look smooth, consistent, and slightly convex. If it looks messy or uneven, something’s off.
Here are common warning signs:
- Excessive spatter around the weld
- Holes or bubbles (porosity)
- Irregular bead shape
- Cracks or weak joints
- Slag trapped inside the weld
Each of these points to a specific issue. It’s like a diagnostic checklist your weld gives you automatically.
How to Diagnose Issues Quickly
Think of troubleshooting like detective work. Start by asking:
- Is the arc stable?
- Is the bead shape consistent?
- Are there visible defects?
Then trace it back to settings, technique, or materials. Over time, this becomes instinctive. Experienced welders can spot a problem within seconds just by looking at the bead.
Problem #1: Electrode Sticking
Causes of Sticking Electrodes
Few things are more frustrating than your electrode sticking to the workpiece. It usually happens when the arc isn’t strong enough to sustain itself.
Common causes include:
- Low amperage
- Incorrect arc length
- Poor grounding
- Damp electrodes
It’s like trying to start a fire with wet wood—it just won’t catch properly.
Practical Fixes
Start by increasing your amperage slightly. Even a small adjustment can make a big difference. Keep a consistent arc length—about the diameter of the electrode.
Also, check your ground clamp. A weak connection can disrupt the current and cause sticking. Finally, store your electrodes in a dry place to prevent moisture absorption.
Problem #2: Excessive Spatter
What Causes Spatter
Spatter happens when molten metal splashes outside the weld pool. It’s messy and wastes material.
Typical causes include:
- High amperage
- Incorrect polarity
- Long arc length
How to Reduce It
Lower your amperage and maintain a steady arc length. Also, make sure you’re using the correct polarity for your electrode type. Small adjustments can dramatically reduce spatter and improve weld appearance.
Problem #3: Porosity in Welds
Root Causes of Porosity
Porosity looks like tiny holes in your weld. It’s caused by trapped gas during solidification.
Common reasons:
- Dirty or rusty metal
- Moisture in electrodes
- Contaminants like oil or paint
Prevention Techniques
Always clean your workpiece thoroughly before welding. Use dry electrodes and store them properly. Think of it like painting—you wouldn’t paint over dirt and expect a smooth finish.
Problem #4: Weak or Cracked Welds
Why Welds Crack
Cracks are serious. They compromise the strength of the weld and can lead to failure.
They often result from:
- Rapid cooling
- High stress in the joint
- Incorrect electrode choice
Strengthening Your Welds
Use the correct electrode for your material and preheat thick metals when necessary. Control your cooling rate and avoid welding in extremely cold conditions.
Problem #5: Arc Instability
Common Causes
An unstable arc feels like it’s flickering or cutting out. It makes welding difficult and inconsistent.
Causes include:
- Poor electrical connections
- Incorrect settings
- Worn electrodes
Stabilising the Arc
Check all connections and adjust your amperage. Use high-quality electrodes and maintain proper technique.
Problem #6: Undercutting
What is Undercut?
Undercutting is when the base metal melts away at the edges of the weld, leaving a groove. It weakens the joint significantly.
Fixing Undercut Issues
Reduce your travel speed and avoid excessive heat. Keep your electrode angle steady and avoid weaving too wide.
Problem #7: Slag Inclusion
Why Slag Gets Trapped
Slag inclusion occurs when flux residue gets trapped inside the weld.
This usually happens due to:
- Poor cleaning between passes
- Incorrect technique
Cleaning and Technique Tips
Always remove slag between weld passes. Maintain proper angle and avoid rushing the process.
Problem #8: Poor Penetration
Causes of Shallow Welds
Poor penetration means the weld doesn’t fuse deeply enough into the base metal.
It’s often caused by:
- Low amperage
- Fast travel speed
- Incorrect electrode size
How to Improve Penetration
Increase your amperage and slow down slightly. Choose the right electrode size for the material thickness.
Pro Tips to Avoid Stick Welding Problems
Equipment Setup
Always double-check your machine settings before starting. Ensure proper polarity, amperage, and connections.
Technique Mastery
Practice is everything. Maintain a consistent arc length, steady hand, and correct angle. Over time, your muscle memory will take over.
FAQs
1. Why does my stick weld look messy?
It’s usually due to incorrect amperage, poor technique, or dirty materials. Adjust settings and clean the surface.
2. What is the best electrode for beginners?
E6013 is often recommended because it’s easy to use and produces smooth welds.
3. How do I stop my electrode from sticking?
Increase amperage slightly and maintain a proper arc length.
4. Can I stick weld rusty metal?
Yes, but cleaning improves weld quality significantly and reduces defects.
5. What causes weak weld joints?
Poor penetration, incorrect electrode choice, or improper technique can all lead to weak welds.
Conclusion
Stick welding might seem challenging at first, but every problem has a clear solution once you understand the root cause. Whether it’s spatter, porosity, or weak welds, the fix usually comes down to adjusting your settings, improving technique, or preparing your materials properly.
The more you weld, the more intuitive it becomes. Eventually, you’ll look at a weld bead and instantly know what went wrong—and how to fix it. That’s when you move from beginner to skilled welder.

")


Leave a Reply