Welding thin metal with a MIG welder is one of the most challenging skills for beginners to master. Unlike thicker materials, thin sheet metal heats up quickly and can easily warp or burn through if your settings or technique are off.
Whether you’re repairing a car panel, working on sheet steel, or tackling a DIY project at home, this UK-focused guide will show you exactly how to weld thin metal with MIG—step by step, with practical tips to help you get clean, professional results.
Contents
What is Considered Thin Metal?
In MIG welding, “thin metal” typically refers to materials under 3mm thick. Common examples include:
- Car body panels
- Sheet steel
- Exhaust systems
- Light fabrication components
These materials require low heat, precision control, and patience.
Why Welding Thin Metal is Difficult
Thin metal behaves very differently compared to thicker steel:
- It heats up extremely quickly
- It can burn through easily
- It is prone to warping and distortion
- It requires more control over weld speed and heat input
👉 That’s why beginners often struggle—but with the right approach, it becomes much easier.
Best MIG Welder Settings for Thin Metal (Guide)
Before you strike your first arc, getting your settings right is critical.
Recommended Setup:
- Wire size: 0.6mm (best) or 0.8mm
- Voltage: Low setting
- Wire speed: Medium to low
- Shielding gas: Argon/CO₂ mix (e.g. 75/25)
- Gas flow rate: 10–12 litres per minute
💡 Most MIG welders in the UK include a settings chart—use it as your starting point, then fine-tune based on your results.
Step-by-Step: How to Weld Thin Metal with MIG
Step 1: Clean the Metal Properly
Clean metal is essential when working with thin materials.
- Remove rust, paint, and grease
- Use a wire brush, sandpaper, or grinder
👉 Even small contaminants can cause weak welds or defects.
Step 2: Ensure Tight Fit-Up
Make sure your pieces fit tightly together.
- Avoid gaps between joints
- Use clamps to hold everything in place
👉 Gaps increase heat concentration and lead to burn-through.
Step 3: Set Low Heat on Your MIG Welder
Thin metal requires less heat than you think.
- Start with the lowest recommended voltage
- Adjust gradually during testing
💡 Always test on scrap metal before welding your actual piece.
Step 4: Use Tack Welding Instead of Continuous Beads
One of the most important techniques for thin metal is tack welding.
Instead of welding continuously:
- Weld small dots (tacks)
- Move to another area
- Let the metal cool
👉 This reduces heat build-up and prevents distortion.
Step 5: Use the Push Technique
When welding thin metal, always use the push technique:
- Push the torch forward (10–15° angle)
- Produces less heat
- Gives a cleaner weld
👉 Avoid pulling, as it increases penetration and heat.
Step 6: Control Your Travel Speed
Your movement speed is critical:
- Too slow → burn-through
- Too fast → weak weld
👉 Aim for a steady, controlled motion and a small, even weld bead.
Step 7: Allow Cooling Between Welds
Thin metal holds heat longer than you think.
- Pause between welds
- Let the metal cool naturally
👉 This prevents warping and distortion.
Pro Tips for Better Results
✔ Use a Copper Backing Plate
Placing copper behind the weld helps:
- Absorb heat
- Prevent burn-through
- Improve weld appearance
✔ Keep Wire Stick-Out Short
Maintain a stick-out of 6–10mm for better control and arc stability.
✔ Use Stitch Welding
Instead of one long weld:
- Weld in short sections
- Connect them gradually
👉 This is ideal for car bodywork and thin panels.
Common MIG Welding Mistakes (Thin Metal)
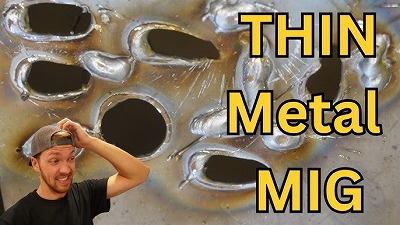
❌ Burn-Through
Cause: Too much heat
Fix: Lower voltage and weld in short bursts
❌ Warping
Cause: Heat build-up
Fix: Spread welds and allow cooling time
❌ Weak Welds
Cause: Moving too fast or low heat
Fix: Adjust speed and increase power slightly
Safety Tips for MIG Welding
Safety should always come first:
- Wear an auto-darkening welding helmet
- Use gloves and flame-resistant clothing
- Work in a well-ventilated area
- Keep flammable materials away
Final Thoughts
Learning how to weld thin metal with a MIG welder takes practice, but it’s a valuable skill—especially for automotive work and DIY projects in the UK.
Focus on:
- Low heat settings
- Short welds (tack/stitch method)
- Controlled speed
With time and practice, you’ll be able to produce clean, strong welds without burning through your material.

")

")
Leave a Reply