Striking an arc is the very first step in welding — and one of the most challenging skills for beginners to master. If you struggle with electrodes sticking, unstable arcs, or excessive spatter, you’re not alone.
In this guide, you’ll learn how to strike an arc properly, the most effective techniques, and how to avoid common beginner mistakes.
Contents
🔧 What Does “Striking an Arc” Mean?
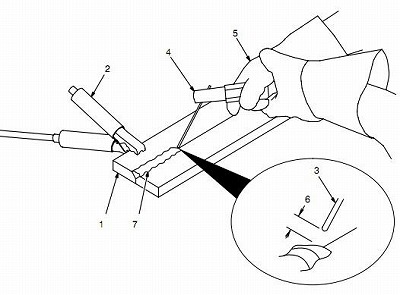
Striking an arc means creating an electrical current between the electrode (rod) and the metal workpiece. This arc generates intense heat that melts the metal and allows you to begin welding.
👉 Without a stable arc, you cannot produce a strong weld.
⚙️ Two Main Ways to Strike an Arc
There are two widely used methods in stick welding (MMA):
1. Scratch Method (Best for Beginners)
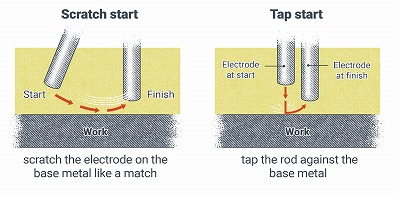
This method is similar to lighting a match.
Steps:
- Hold the electrode at a slight angle (10–15°)
- Drag it lightly across the metal surface
- Lift slightly once the arc is established
Why it works:
- Easier control
- Less chance of sticking
- Ideal for beginners
2. Tap Method
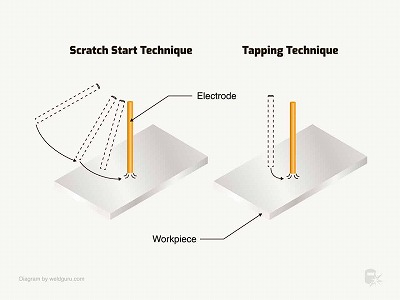
This method involves tapping the metal quickly.
Steps:
- Tap the electrode onto the metal surface
- Lift immediately to create the arc
Challenges:
- Requires better timing
- Higher chance of sticking if you’re too slow
👉 Usually recommended once you gain more experience.
📏 Maintain the Correct Arc Length
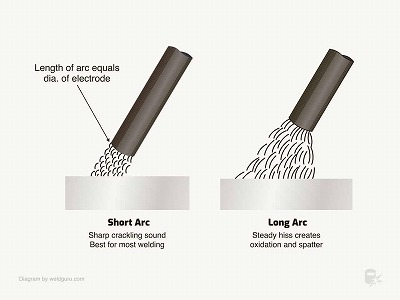
Once the arc is struck, maintaining the right distance is crucial:
- Ideal arc length = roughly the diameter of the electrode core
- Too long → unstable arc, spatter
- Too short → electrode sticks
👉 Think of it as a small, controlled gap — not touching, not too far.
⚡ Set the Right Amperage
Incorrect settings are a major cause of arc problems.
General guideline:
- 2.0mm rod → 40–80A
- 2.5mm rod → 60–100A
- 3.2mm rod → 90–130A
👉 If the rod keeps sticking, your amperage is likely too low.
❌ Common Problems When Striking an Arc
1. Electrode Sticking to Metal
Cause:
- Low amperage
- Holding too close
- Slow movement
Fix:
- Increase current
- Use scratch method
- Move faster when starting
2. Arc Won’t Start
Cause:
- Poor ground connection
- Dirty metal surface
Fix:
- Check earth clamp
- Clean the workpiece
3. Excessive Spatter
Cause:
- Arc too long
- Current too high
Fix:
- Shorten arc length
- Adjust amperage
4. Arc Keeps Cutting Out
Cause:
- Inconsistent hand movement
- Unstable arc length
Fix:
- Keep steady hand
- Focus on maintaining distance
🧠 Pro Tips for Beginners
- Start with E6013 electrodes (easier arc start)
- Practise striking arcs without welding full beads
- Use scrap metal to build confidence
- Keep your wrist steady — avoid large movements
- Listen to the sound: a stable arc sounds like a steady “buzz”
🛡️ Safety Tips (UK Standards)
- Use an auto-darkening welding helmet (EN379 approved)
- Wear insulated gloves and flame-resistant clothing
- Avoid damp environments (important in UK conditions)
- Ensure proper grounding
❓ FAQs
Why does my welding rod keep sticking?
Usually due to low amperage or incorrect technique. Try increasing current and using the scratch method.
Is striking an arc the hardest part of welding?
For many beginners, yes — but it becomes easy with practice.
How long should the arc be?
About the same as the electrode diameter — typically 2–3mm.
🏁 Final Thoughts
Learning how to strike an arc properly is the foundation of successful stick welding. Once you master this skill, everything else — from bead control to weld strength — becomes much easier.
Take your time, practise regularly, and focus on consistency rather than speed.

")

")
Leave a Reply