Cutting crown moulding is one of the most advanced mitre saw skills—but once mastered, it delivers a truly professional finish. Whether you’re renovating a period property or upgrading interiors, learning how to cut crown moulding with a mitre saw is essential for clean, tight-fitting joints.
In this UK-focused guide, you’ll learn step-by-step methods, correct angles, and expert tips to avoid costly mistakes.
Contents
- What Makes Crown Moulding Difficult?
- Two Methods for Cutting Crown Moulding
- Method 1: Cutting Crown Moulding Flat (Recommended)
- Step-by-Step (Flat Method)
- Method 2: Cutting Crown Moulding Upright (Nested)
- Internal vs External Corners
- Pro Tips for Perfect Crown Moulding Cuts
- Common Mistakes to Avoid
- Specific Tips
- Quick Angle Cheat Sheet
- ❓ FAQs: Cutting Crown Moulding with a Mitre Saw
What Makes Crown Moulding Difficult?
Unlike flat materials, crown moulding sits at an angle between the wall and ceiling. This means you often need compound cuts (mitre + bevel).
👉 Challenges include:
- Complex angle settings
- Incorrect positioning
- Confusing left/right cuts
Two Methods for Cutting Crown Moulding
1. Flat Method (Compound Cuts)
- Moulding lies flat on the saw
- Requires both mitre and bevel angles
👉 Best for: Precision and consistency
2. Upright Method (Nested Position)
- Moulding is placed at its installed angle
- Only mitre angle is adjusted
👉 Best for: Simplicity and beginners
Method 1: Cutting Crown Moulding Flat (Recommended)
Standard UK Crown Settings (Common Guide)
For typical 38° spring angle moulding:
- Mitre angle: ~31.6°
- Bevel angle: ~33.9°
👉 These are standard reference angles used by professionals.
Step-by-Step (Flat Method)
Step 1: Measure and Mark
- Measure wall length
- Mark clearly
Step 2: Lay the Moulding Flat
- Place it flat on the saw table
- Decorative side facing up
Step 3: Set Mitre and Bevel Angles
- Adjust mitre to ~31.6°
- Adjust bevel to ~33.9°
- Lock both settings securely
Step 4: Identify Cut Direction
⚠️ This is the hardest part:
- Left corner vs right corner requires mirrored cuts
- Always visualise the final position before cutting
Step 5: Make the Cut
- Start saw → reach full speed
- Lower blade slowly
- Do not force
Step 6: Test Fit
- Always test joints before final installation
Method 2: Cutting Crown Moulding Upright (Nested)
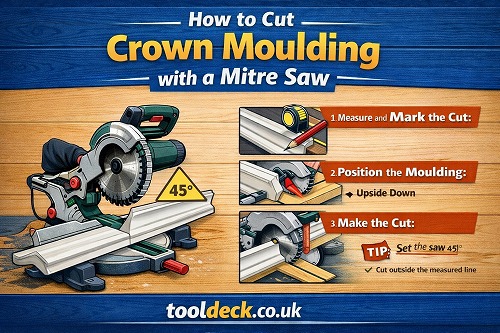
Step 1: Position the Moulding
- Place it against the fence at the same angle as wall/ceiling
Step 2: Set Mitre Angle Only
- Typically 45° for standard corners
Step 3: Cut Carefully
- Maintain firm positioning
- Ensure it doesn’t shift
👉 This method is easier but less precise than compound cuts.
Internal vs External Corners
Internal Corners
- Most common
- Requires tight joints
- Often uses compound cuts
External Corners
- Visible edges → must be precise
- Requires mirrored angles
Pro Tips for Perfect Crown Moulding Cuts
✔ Use a Double Bevel Mitre Saw
Makes compound cuts much easier and faster.
✔ Use a Crown Stop
Helps position moulding correctly every time.
✔ Label Each Cut
Avoid confusion with left/right orientation.
✔ Practice on Scrap
Crown moulding is expensive—always test first.
Common Mistakes to Avoid
❌ Wrong Orientation
Biggest mistake—always simulate final position.
❌ Incorrect Angle Settings
Small errors = visible gaps.
❌ Skipping Test Cuts
Leads to wasted material.
❌ Rushing the Process
Precision is everything with crown moulding.
Specific Tips
- Older UK homes often have uneven ceilings → expect adjustments
- MDF crown moulding is easier to cut than hardwood
- Use decorator’s caulk for minor gaps
Quick Angle Cheat Sheet
| Type of Cut | Typical Setting |
|---|---|
| Standard corner | 45° (nested) |
| Flat method | 31.6° / 33.9° |
| Straight cut | 0° |
❓ FAQs: Cutting Crown Moulding with a Mitre Saw
What angle do you cut crown moulding in the UK?
For standard crown moulding, common settings are 31.6° mitre and 33.9° bevel (flat method) or 45° mitre when cutting upright.
Is it better to cut crown moulding flat or upright?
Cutting flat is more accurate but requires compound angles. Cutting upright is easier and better for beginners.
Why are my crown moulding joints not fitting?
Common issues include incorrect angle settings, wrong orientation, or uneven walls and ceilings—especially in older UK homes.
Do I need a double bevel mitre saw for crown moulding?
It’s not required, but a double bevel saw makes compound cuts faster and more accurate.
Can beginners cut crown moulding with a mitre saw?
Yes, but it requires practice. Start with the upright method and test on scrap material before final cuts.
How do you avoid gaps in crown moulding joints?
Use accurate measurements, correct angles, and test fits. Small gaps can be filled with caulk for a clean finish.
Final Thoughts
Learning how to cut crown moulding with a mitre saw takes practice, but it’s one of the most rewarding woodworking skills. With the right angles, setup, and patience, you can achieve seamless, professional results.
👉 Key takeaway:
- Understand compound angles
- Always test before final cuts
- Take your time


Leave a Reply